Valentine’s Birthday and so much more

With a birthday on Valentine’s day, I have been showered with heart warming gifts.

My dear friend Liz in Oregon, who is a marvelous quilter and a member of one of my Lace Round Robin made this beautiful fabric collage for me. Notice how the hands form a heart? HER hands, which she traced and reduced on the computer before cutting in fabric. And do you see all the details, the tiny little red buttons, and the rhinestones? Love!

IMG_0946

I have also exchanged a fabric collage with my new friend in the UK, Alison. She sent me this wonderful vintage page. And the tag!!! Notice the tag!?!?!?!? All that hand embroidery is just exquisite. I did suggest she considers using some of that beautiful stitching in her collages, it’s so beautiful, and something that most of us don’t do or won’t do anymore.

  IMG_0949IMG_0950

Here is the one I sent Alison. I had just finished a batch of dyeing, and I had this deed wine color. An acquired taste, but Alison has received it and she likes it:

CIMG6905CIMG6902CIMG6903CIMG6904


Beautiful Suzy in Australia sent this beautiful fabric ‘card’. Don’t you just love these soft pastels? Lovely.

IMG_0951

Lucky me, she’d already sent me a collage last month, this time in these gorgeous browns and rusts that I so love.


IMG_0952

My dear friends from Canada surprised me with a dozen red roses!!!! Imagine. I thought I was passed the age of getting red roses on Valentine’s Day. And aren’t they just magnificent?

IMG_0939


In the middle of all this happiness, I managed to finish a new bracelet cuff, and to list it on Etsy.

IMG_0943IMG_0944


And I even posted a painting on Etsy too. This one is 16x20, on stretched canvas.  It was done earlier and didn’t seem to have made it to the Etsy site, so here it is. I exhibited it in a show in Vancouver. It was quite popular and got rave reviews, but I ended up selling a much larger one. I used alcohol inks on a canvas base. IMG_0947

Tucson Bead Show and a nice surprise

I spent 3 days at the Tucson Bead Show. A bit short, but for my first experience, it certainly was enough. Even just the Beads part of the fair is enormous, and much to see. This is just one of the tent near the highway, by no means part of the main shows.

CIMG6913

I replenished my stash for the coming year, and scored some beauties. I found these lovely Czech glass buttons. They will be the centre piece of a necklace to come.

CIMG6926

These below are actually resin, then baked with metallic paint. Yummm.


CIMG6927

And no, this next photo is not out of focus, it’s the way I felt at the end of each day…

CIMG6919

I wore one of my necklaces each day and received lots of compliments. The biggest surprise, however, came from one of the vendors who fell in love with my lace bag, and wants me to make some for her clients!!!!

This is the front side:

CIMG6928


And this is the back side. Or vice versa!

CIMG6929

They are made with doilies, wedding lace dyed in coffee, sari silk ribbons, and some dooh dahs to dress up the front. The sides are embellished with upholstery trims.

CIMG6931

So off I go to prepare more lace bags, while all my new beads are waiting for  me and tempting me… If you want one, let me know, since I’m in the mood for making them! They are all different, and I’m also going to dye one and match the laces, for something not so sepia. An experiment.

Winner of blog giveaway

This blog hop and give away has been an amazing experience for me, and I am thrilled and humbled by your kind comments and compliments on my art.

THANK YOU, THANK YOU so much for taking the time to come over and visit and leave a comment.

Thank you so much to my new followers and new friends! You are just amazing!

And thank you so much to Vicki for making this great blog party possible.

Today is THE DAY! This lace book journal is headed to a new home.

CIMG6749

And the winner is… Maggie Raguse of “The Mag Rag” blog.

Congratulations Maggie. Do email me with your address so I can send this lace book to its new home. I wish I had 100 of my journals to give away for each of you beautiful people who came to visit.

In the meantime, I continue to work on the tutorial. I’ve posted the first part here, on how to print your own images on fabric. I have also been busy putting together a kit for the lace pages, so you can follow along with your own, just as in the tutorial. You can find it here. I will be making more in the next few days, and preparing the next step of the tutorial: transferring laser copies to fabric.

The lace book kit contains everything you need to make your own lace page, all ready for you to put it together. It’s an easy way to practice on your first page.

Lace fabric page kit

Lace fabric page kit

I WILL continue to do a monthly give away, so be sure to come back and enter your name.

Thank you to everyone who visited. It was an awesome party and you made it special. I love you!

A steampunk journal cover

In the Kindred Souls Round Robin, I have picked A steampunk Air Travel as my theme. Koinkidenkilly, I saw a beautiful Prima kit at a weekend conference, prepared for a class by Finnabair. I didn’t take the class or attend the conference, but I sure got my hands on this gorgeous Prima Sunrise Sunset kit.
Not even released yet! I hope they do soon, because Im going into serious withdrawal. Are you reading this, Prima?????
The kit gave some explanations on how to achieve ‘the look’. I can’t claim that I have, but I had so much fun making the covers for my book:
CIMG6812CIMG6813
The Prima kit comes with all the metal flowers, and the fabric flowers. It also has the grunge board letters, the metal wheels, and lots of dooh dahs!!!
LOVE!

I didn’t take any pictures of the inside, because I forgot! Here’s the main heroine, MS Magdalena Orgenloff. Dressed for her journeys and adventures around the world. A little montage in Photoshop. Her various parts come from a kit on DeviantScrap from Brimm-steamtown-celebrations. Fun!


lady

Oh, valid point, Kathy, I didn't describe the process. I painted the background with white gesso, because it was cardboard. Then I glued down cardboard pieces, cheesecloth, and with the gel medium I was using, I also make some marks and designs. Then I used spray glimmer mists from 'outsidethemargins.com' since I've had good luck with their sprayers. I also added some titan buff and gold paint, and van dyke brown for edging the sides. Voila!

The Rosa of Cairo

In the Round Robin on Vintage Ancestors, the next book I worked in is Teri’s book. All about this famous tailoring studio, which appears in Paris after the intervention of another RR player! Thanks Sue. 
In my pages, the Sheik of Arabia comes to the studio, meets Auntie Rosa, falls in love with her, and marries her.
Not until he orders her wedding gown to be made by the studio. Hence the introduction of ARABesques, and damasks in Paris, which became all the rage at in the 19th century.
This is how she became the Rosa of Cairo.

CIMG6855

The left page shows the scroll that tells the story.
CIMG6857CIMG6859
CIMG6858
The scroll ‘holder’ has a story. I was browsing on the internet to find some arabic text. And I saw this scroll holder which just triggered my mind. Yesterday, a wonderful neighbor gave  me a bag of goodies. You know, broken jewelry, unloved scarves and earrings. And  this outrageous pen. We both looked at each other, wondering what I could possibly do with it.
Well, not 24 hours later, this wonderful pen has become a jewelled scroll holder! Don’t you just love synchronicity?
CIMG6860
And here is Auntie Rosa herself, quite transformed, and quite glamorous on her wedding day…

Beautiful people and a tutorial

I am humbled by the number of gracious people who stopped by my blog and took the time to comment on my work. You ladies rock! I am so happy that you find pleasure in what you saw.
And thank you to all the glorious women who became followers. I can’t wait to get to know you. I’ve made many wonderful friends online already. What a great way to connect!
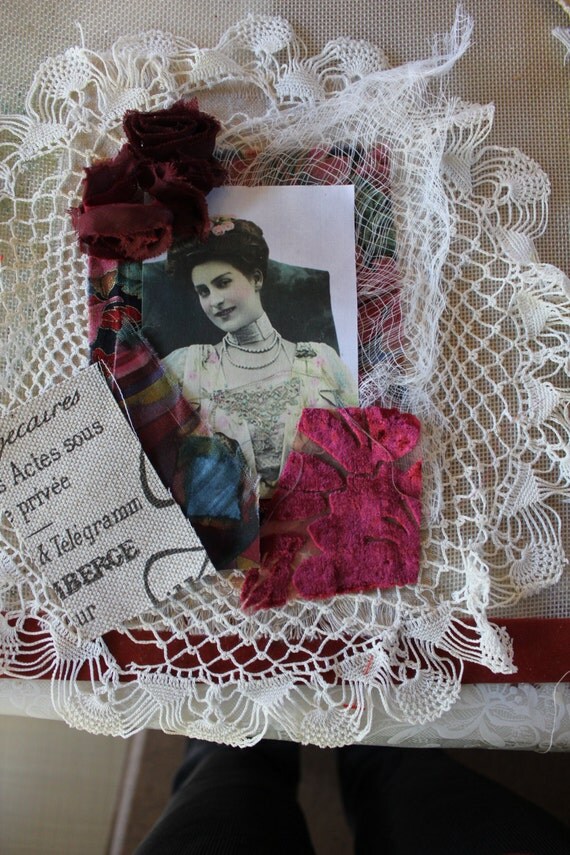
It’s my pleasure to announce that I’m launching a lace kit so you can make one of the fabric lace pages like this one:
IMG_0894
The kit will contain everything that is needed: a choice of two images printed on fabric, the doillies, a piece of antique lace from my private collection, vintage buttons, a piece of jewelry, everything. Just go to my store to get a complete kit.
It will work along with the tutorial that I post on this blog.
And since so many of you are interested in the tutorial, let’s start TODAY!!!!!
The first thing you need for your fabric collage is a great image on fabric. Yes, you need lace and more lace, but if your image is not right, your collage will not be stunning.

There are many ways to get a good image on fabric. The fastest and most expensive way is to buy your fabric ready to go from brands like Jacquard, Claudine Hellmuth, Fredrix. You just Google them and you will have an infinite choice of material, such as canvas, cotton, silk, organdy. And a choice of prices too. These are ready to run through your printer, either laser or inkjet. You can find most brands at Michaels or Joann’s, and most definitely online, Amazon being a quick source.
The next method which I like to use, gives great results, and is inexpensive, is to create my own fabric sheets ready for the printer. That way, I have the choice of the materials and fabrics I’ll use.
You need some freezer paper and an iron. Any old brand of freezer paper will do. Freezer paper is found in most grocery stores in the same aisle as foil, plastic wrap, etc. Make sure it says FREEZER paper. Do not use wax paper, it’s not the same thing and wax paper won’t work.
It’s best if your fabric is ready to go. By that, I mean have it coffee or tea stained already, and ironed flat.
Take a long sheet of the freezer paper, and with the glossy side up, iron your fabric on the glossy paper. The glossy is a very mild type of wax that will bond your fabric to the freezer paper.

You can even buy your freezer sheets already cut to 8.5 x 11. These are $8.95 for 30 sheets.
Freezer Paper Sheets
If you have not bought precut freezer sheets, then take a blank sheet of printer paper, and place it on your freezer/fabric. Cut around the freezer paper, although slightly smaller than the freezer paper is better. Make sure there are no stray bits of threads that could get caught in  your printer.
Voila. All you have to do now is run your freezer/fabric through your printer as you would with paper. Select an image that has good contrast. You can manipulate your image in any free image processor online, to make sure it has good contrast.
Some printers will have a setting for printing on fabric. My HP does.
Then print. Once the freezer/fabric comes out, gives it a minute for the ink to dry, then peel the fabric from the freezer paper. Your image is now ready to sew onto the fabric collage.
Sometimes, you’ll find that the ink is still a bit faint. Golden make a great product, that of course, being Golden, is not cheap! Sad smile(
They are a product designed specifically for printing on unusual surfaces. You apply a coat all in one direction. Let it dry. Then apply a second coat going against the previous direction. Let dry. Then you end up with the same fabric you could have paid a fortune for at the art store. It definitely makes a difference, even if you only apply one coat.
Here is a pretty lady that is free for you to use in  your fabric collage. Do come back for the next step of making your collage: preparing your fabrics. In the meantime, go through your stash and start pulling pretty fabrics. Or go to my store to get a complete kit.
37
Email me if you have any questions. I’m happy to help.
And  you can still enter my blog giveaway. See the post immediately below. The draw is Feb 1. 
See you soon!

Blog giveaway

How nice of you to visit!
Come in, it’s nice and sunny in Palm Springs today, 72F, almost summer. I have lived here since July, seeking the endless sun.
CIMG6725
My name is Socrates, and this is my faithful studio assistant, Paul, working hard by the pool…
CIMG6685CIMG6745
Come in! Have a look!
I make lace books, beaded jewelry, and I paint abstract paintings.
CIMG6668CIMG6784
CIMG6765
CIMG6770Based on sherri design
The paintings are on canvas, 36x48
oysterCIMG3835
CIMG3822 a
I also love to make lace books. Here:
IMG_0846
CIMG4986CIMG4987CIMG4991
IMG_0797IMG_0796IMG_0864IMG_0865IMG_0894

At the moment, I’m putting together a tutorial on how I make these fabric collages. It will be available in the next week, so come back to find out.
And in honor of your visit, I created a vintage Paris journal, just for you. You don’t have to become of follower, although I’d love you to, so we can meet again. All you need do is leave a comment on this post.
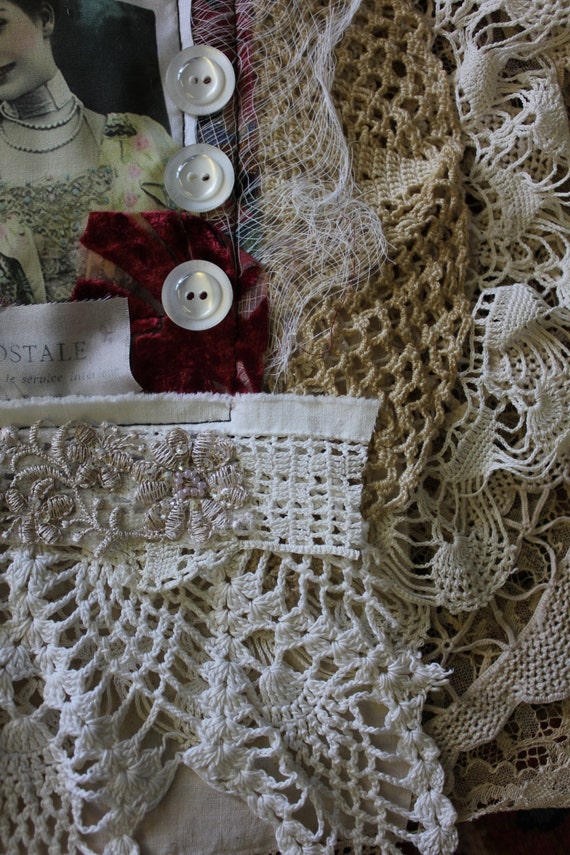
On Feb 1, all of the  members of the blog hop will have their draw. I will pick a  name at random from the comments list and one of you will receive this vintage Paris journal. Here it is, full of old laces which I buy on Ebay or find at garage sales. There are doilies, mattress ticking, pieces of old jewelry, and plenty of painted and white pages inside for you to keep notes and records, or add photos:
CIMG6749CIMG6750CIMG6751CIMG6752CIMG6753
This is the inside front cover, with a little pocket, and the first page, lightly painted.CIMG6754CIMG6755
CIMG6756
CIMG6757
This is the inside back cover, with more lace and beaded lace. And the back cover, with a printed map of Paris on fabric, more lace and some vintage buttons.
And the spine, with some charms, because you ARE a Star!!!!!CIMG6758
Let me know if you would like me to make a piece for you, either lace book or jewelry. I would be happy to.
Be sure to leave a comment today, and come back on the 1st of February when I will announce the winner!
Good luck, and thank you for your visit. And be sure to visit the other blogs: